Introduction
Chocolate thumbprint cookies are a delightful twist on traditional cookies, combining the rich flavor of chocolate with a creamy filling. These little gems are perfect for any occasion, whether it’s a holiday gathering or simply a treat for yourself after a long day.
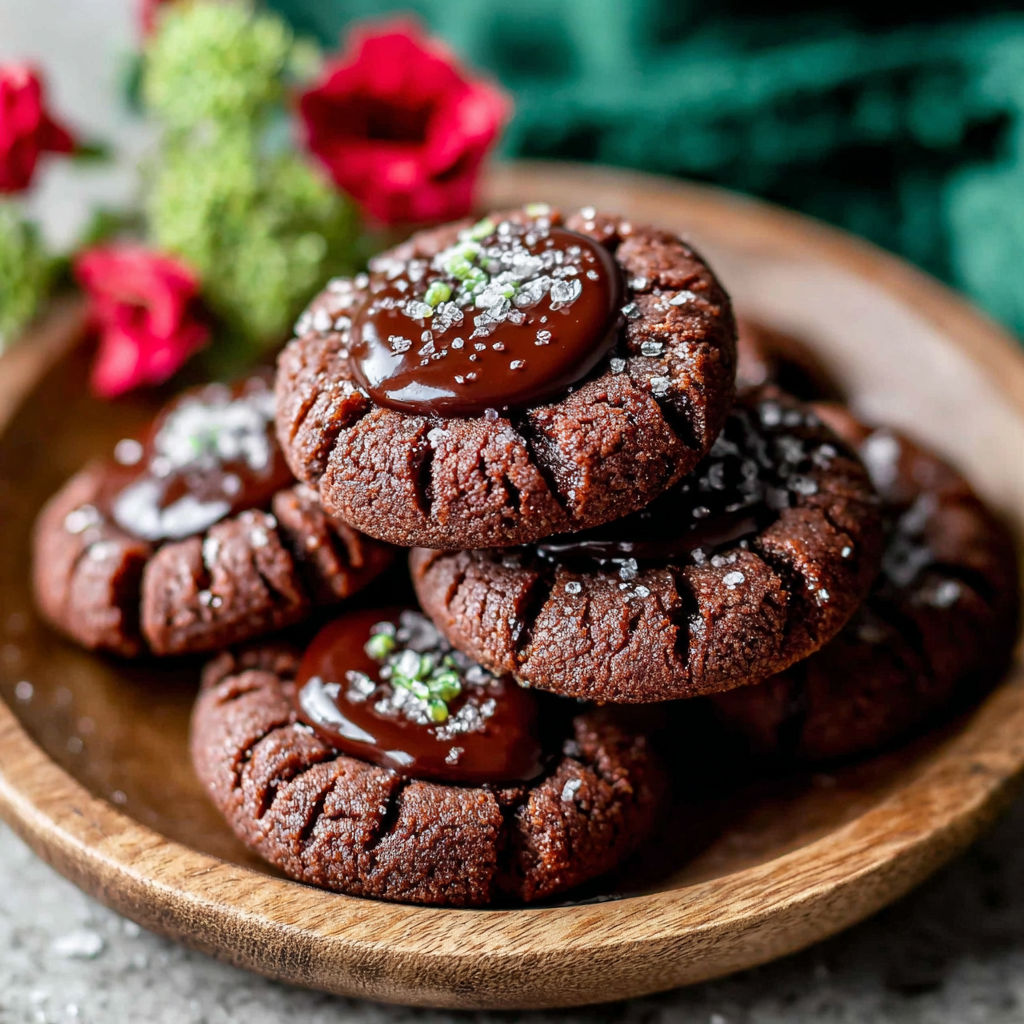
The beauty of these cookies lies not only in their taste but also in their charming appearance. Each cookie features a thumbprint that cradles a dollop of delicious chocolate ganache or jam, inviting you to take a bite. They're surprisingly easy to make, even for those new to baking.
Ingredients
- 1 cup all-purpose flour
Flour provides the structure for the cookies, providing the appropriate texture and stability. All-purpose flour is versatile, ensuring a balanced cookie that’s neither too dense nor too crumbly. - 1/4 cup unsweetened cocoa powder
Cocoa powder adds deep chocolate flavor to your cookies. It also contributes to the color and can affect the texture slightly, giving it a delightful richness. - 1/2 teaspoon baking powder
Baking powder acts as a leavening agent, helping the cookies rise and become light. It ensures that the cookies will have a nice, tender crumb, preventing them from being overly dense. - 1/4 teaspoon salt
Salt enhances the flavors of the cookies, balancing the sweetness and making the chocolate taste even richer. It’s an essential ingredient that elevates the overall flavor profile. - 1/2 cup unsalted butter, softened
Butter provides richness and moisture to the cookies. It helps create a tender and flavorful base, allowing for a melt-in-your-mouth texture that pairs beautifully with chocolate. - 1/2 cup granulated sugar
Sugar sweetens the cookies and encourages browning, contributing to their vibrant flavor. It also plays a role in creating a pleasant texture, aiding in the soft yet crumbly bite. - 1/4 cup brown sugar, packed
Brown sugar introduces moisture and a hint of caramel flavor due to the molasses content. It complements the cocoa powder, resulting in a richer taste and chewier texture. - 1 teaspoon vanilla extract
Vanilla extract lends a warm, aromatic flavor to the cookies, making them more enticing. It adds complexity and balances out the sweetness of the sugars. - 1 egg
Eggs act as a binding agent in the dough, helping to combine all ingredients while contributing to the cookies' moistness. They also promote a tender texture and assist in rising. - 1/2 cup chocolate chips or jam for fillings
Chocolate chips or jam serve as the star of the thumbprint, adding an indulgent contrast to the cookie. The filling enhances each bite, providing flavor and a delightful surprise.
Directions & Preparation
Step 1: Preheat your oven to 350°F (175°C).
Preheating your oven ensures that your cookies bake evenly and correctly. If the oven is not hot enough, the cookies might spread too much or not rise properly, resulting in a less-than-perfect texture.
Step 2: In a mixing bowl, whisk together flour, cocoa powder, baking powder, and salt.
Whisking the dry ingredients together ensures they are well combined, preventing any clumps of cocoa powder from forming. This mixed dry base is crucial for an even distribution of flavors and textures in the dough.
Step 3: In another bowl, cream the softened butter with granulated sugar and brown sugar until light and fluffy.
Creaming the butter and sugars together incorporates air into the mixture, making the cookies light. This step is key to achieving the desired texture, so take your time to ensure it’s thoroughly blended.
Step 4: Add in the vanilla extract and egg, and mix until fully incorporated.
Incorporating the egg and vanilla brings moisture and flavor to the cookie dough. Mixing well ensures that the ingredients combine evenly, which is critical for uniform flavor and consistency.
Step 5: Gradually add the dry mixture to the wet ingredients until just combined.
Mixing the dry ingredients into the wet mixture gradually helps prevent overworking the dough. Overmixing can lead to tough cookies, so stop mixing as soon as the flour is barely incorporated.
Step 6: Chill the dough for about 30 minutes in the refrigerator.
Chilling the dough allows the flavors to meld and the fats to solidify, which helps the cookies maintain their shape while baking. This step can prevent excessive spreading and create a better texture.
Step 7: Shape the cookie dough into 1-inch balls and place them on a lined baking sheet.
Forming the dough into uniform balls ensures even baking. Keeping the dough balls consistent in size ensures that each cookie will bake through at the same rate, leading to uniform results.
Step 8: Use your thumb to create an indentation in the center of each ball.
The thumbprint technique not only gives these cookies their name but also creates a perfect space for the filling. This step is essential for even distribution of the chocolate or jam, which should ooze slightly into the center for best results.
Step 9: Fill each indentation with chocolate chips or jam.
Filling the indentations right before baking prevents any overflow while allowing the center to melt slightly or heat up nicely during baking. This step ensures that every bite contains that delicious filling.
Step 10: Bake for 10-12 minutes, until edges are firm.
Baking time is crucial; overbaking can result in dry cookies. Watch for the edges to set while the centers should remain a bit soft. They'll continue to cook on the tray after you remove them from the oven.
Step 11: Allow the cookies to cool on the baking sheet for a few minutes, then transfer to a wire rack to cool completely.
Letting the cookies cool on the baking sheet helps them firm up without breaking apart. After a few minutes, transferring them to a wire rack allows for proper airflow, preventing soggy bottoms and maintaining crispness.

Exploring Flavor Variations
While the classic chocolate filling is a staple, consider experimenting with various flavors. Substituting different jams like raspberry or apricot can provide a fruity contrast that complements the rich chocolate. Alternatively, try adding a hint of spice, such as cinnamon or chili powder, to the cookie dough for an adventurous twist.
The Importance of Chilling Dough
Chilling the cookie dough is often overlooked but critical for success. It helps to solidify the fats in the dough, preventing excessive spreading during baking. This results in cookies that maintain their shape and have the perfect balance of crisp edges and soft, chewy centers, making every bite delightful.
Perfect Pairings for Thumbprint Cookies
These chocolate thumbprint cookies can be enjoyed on their own, but pairing them with a beverage enhances the experience. A glass of milk or a rich cup of coffee complements the chocolate flavor beautifully. For a grown-up twist, serve them alongside a robust red wine, which will elevate the cookie’s richness.
FAQs
What should I do if the dough is too thick?
If your dough feels too thick, add a teaspoon of milk or melted butter gradually until it reaches a softer consistency. Be cautious not to add too much at once to maintain the proper dough balance.
Why did my cookies turn out bland?
If your cookies lack flavor, ensure you measure ingredients accurately, particularly the sugar. Additionally, check that your vanilla extract is fresh, as stale ingredients can diminish overall flavor.
Can I make these cookies with different fillings?
Yes, experimenting with fillings can add a unique twist. Nut butters, flavored ganaches, or even meringue can serve as delightful alternatives to chocolate or jam.
What should I do if my cookies spread too much?
If your cookies spread excessively, it could be due to warm dough or not chilling it long enough. Next time, ensure your dough is properly chilled before baking and consider checking the oven temperature with an oven thermometer.
Can I replace cocoa powder with chocolate?
You can substitute melted chocolate for cocoa powder, but adjust the flour and sugar to maintain consistency. For every 3 tablespoons of cocoa powder, use 1 ounce of melted chocolate, reducing sugar slightly.
How do I know when my cookies are done baking?
Your cookies are done when the edges appear set, but the centers remain slightly soft. They should look firm without being overbaked to guarantee a chewy texture.
Conclusion
Baking chocolate thumbprint cookies is not just about creating a treat; it's an experience that brings joy to both the baker and the enjoyer. The melding of flavors alongside the simple process creates a rewarding result that's perfect for any occasion.
These cookies are versatile, customizable, and inviting, making them a great choice for sharing with friends and family. Whether you're looking for a go-to dessert recipe or a special treat, chocolate thumbprint cookies will surely satisfy!
Recipe Card

Delightful Chocolate Thumbprint Cookies for Home Bakers
Ingredients
- 1 cup all-purpose flour
- 1/4 cup unsweetened cocoa powder
- 1/2 teaspoon baking powder
- 1/4 teaspoon salt
- 1/2 cup unsalted butter softened
- 1/2 cup granulated sugar
- 1/4 cup brown sugar packed
- 1 teaspoon vanilla extract
- 1 egg
- 1/2 cup chocolate chips or jam for fillings
Instructions
- Preheat your oven to 350°F (175°C).
- In a mixing bowl, whisk together flour, cocoa powder, baking powder, and salt.
- In another bowl, cream the softened butter with granulated sugar and brown sugar until light and fluffy.
- Add in the vanilla extract and egg, and mix until fully incorporated.
- Gradually add the dry mixture to the wet ingredients until just combined.
- Chill the dough for about 30 minutes in the refrigerator.
- Shape the cookie dough into 1-inch balls and place them on a lined baking sheet.
- Use your thumb to create an indentation in the center of each ball.
- Fill each indentation with chocolate chips or jam.
- Bake for 10-12 minutes, until edges are firm.
- Allow the cookies to cool on the baking sheet for a few minutes, then transfer to a wire rack to cool completely.
Notes
Additional serving suggestions: pair with a crisp salad, garlic bread, or roasted seasonal vegetables for balance.
For make-ahead, prep components separately and assemble just before heating to preserve texture.
Taste and adjust with acid (lemon/vinegar) and salt right at the end to wake up flavors.


