Introduction
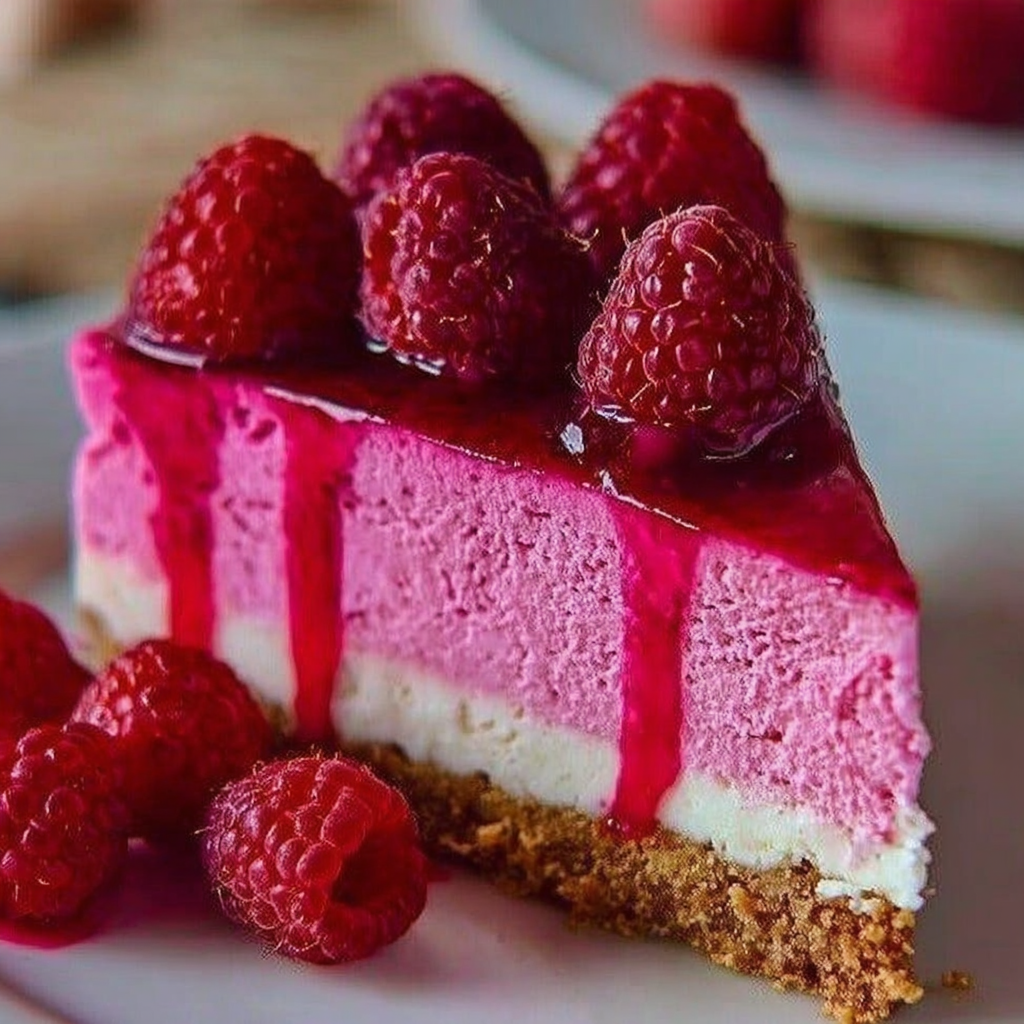
The Pink Velvet Raspberry Cheesecake is a stunning dessert that combines the richness of classic cheesecake with the vibrant flavors of raspberries, all enveloped in a delightful pink hue. Not only is it visually striking, but its taste spectrum—from creamy to tart—makes it an instant hit for any occasion.
Perfect for celebrations, gatherings, or simply as a treat for yourself, this cheesecake embraces elegance while being approachable for home cooks. The layers of flavor and texture create a harmonious balance that promises to impress your family and friends.
Crafting this cheesecake allows you to showcase your baking skills and creativity, transforming a traditional dessert into a modern masterpiece. So roll up your sleeves and dive into the delicious world of Pink Velvet Raspberry Cheesecake!
Ingredients
- 2 cups graham cracker crumbs
Graham cracker crumbs serve as the base for the cheesecake crust, providing a sweet and slightly crunchy texture that contrasts beautifully with the creamy filling. - 1/2 cup unsalted butter, melted
Melted butter binds the graham cracker crumbs together, creating a cohesive mixture that holds its shape once baked. It also adds richness to the crust. - 3 (8 oz) packages cream cheese, softened
Cream cheese is the star ingredient that delivers the creamy texture and rich flavor characteristic of a cheesecake. Ensure it's softened for easy blending. - 1 cup granulated sugar
Granulated sugar sweetens the cheesecake filling, balancing the tanginess of the cream cheese and providing a smooth texture. - 3 large eggs
Eggs provide structure and stability to the cheesecake, helping it set properly during baking—for a creamy yet firm slice with each bite. - 1 teaspoon vanilla extract
Vanilla extract enhances the overall flavor profile, adding warmth and depth that complements the other ingredients beautifully. - 1/2 cup raspberry puree
Raspberry puree infuses the cheesecake with vibrant flavor and color, contributing to the pink shade and providing a tart contrast to the sweetness. - 1 tablespoon fresh lemon juice
Fresh lemon juice brightens the flavors of the cheesecake, cutting through richness and enhancing the overall taste of the dessert. - Red food coloring (optional)
Red food coloring can be added to heighten the pink hue of the cheesecake, giving it a visually appealing and festive look for special occasions. - Fresh raspberries for garnish
Fresh raspberries add a pop of color and a burst of flavor when used as a garnish, making the dessert more appealing and inviting.
Directions & Preparation
Step 1: Preheat the oven to 325°F (163°C).
Preheating the oven is crucial for helping the cheesecake set evenly. An adequately heated oven ensures that the crust and filling bake correctly, avoiding cracks and maintaining a smooth surface.
Step 2: Prepare the crust by combining graham cracker crumbs and melted butter.
Mixing the graham cracker crumbs with melted butter will create a sandy texture that holds together when pressed into the pan. Ensure all crumbs are evenly coated for a consistent crust that will bake to a golden brown.
Step 3: Press the mixture into the bottom of a springform pan.
Using the back of a measuring cup or your hands, firmly pressing the crumb mixture into the pan is essential. This step ensures that the crust is compact and doesn't crumble when slicing the cheesecake later on.
Step 4: Bake the crust for 10 minutes and let it cool.
Baking the crust sets it and gives it an initial crispness, preventing it from becoming soggy. Allowing it to cool before adding the filling prevents the filling from overheating during the baking process.
Step 5: In a large bowl, beat the cream cheese until smooth.
Beating the cream cheese thoroughly ensures a silky-smooth filling without lumps. Achieving this consistency is fundamental for a creamy cheesecake texture once baked.
Step 6: Add sugar, eggs, vanilla, raspberry puree, and lemon juice to the cream cheese.
Incorporating these ingredients creates a balanced filling that is sweet, tart, and rich. Make sure to blend them well to avoid any streaks or inconsistencies in texture and flavor.
Step 7: Add food coloring to achieve desired pink color.
This step is optional, but adding food coloring allows you to adjust the shade of your cheesecake. The result can vary from a soft blush to a vibrant pink, enhancing the dessert's visual appeal.
Step 8: Pour the filling over the cooled crust.
Pouring the cheesecake mixture into the crust in one go helps to limit air bubbles, ensuring a smooth surface. Spread the filling evenly to guarantee a uniform bake.
Step 9: Bake the cheesecake for 55-60 minutes until the edges are set.
Baking the cheesecake slowly allows it to rise evenly and minimizes cracks. Keeping an eye on the edges to confirm they're set, while the center remains slightly jiggly is key for achieving the perfect texture.
Step 10: Turn off the oven and let the cheesecake cool inside for 1 hour.
Allowing the cheesecake to cool gradually in the oven helps prevent sudden temperature changes that can result in cracks. This slow cooldown ensures a smooth top and set filling.
Step 11: Chill the cheesecake for at least 4 hours, preferably overnight.
Chilling the cheesecake is an important step that allows flavors to meld and the filling to firm up properly. This enhances the overall texture and taste when you slice into it.
Step 12: Garnish with fresh raspberries before serving.
Garnishing with fresh raspberries adds freshness and a striking contrast against the pink cheesecake. This final touch elevates the presentation and adds an extra layer of flavor.

The Importance of Raspberry Puree
Raspberry puree is a pivotal ingredient that not only delivers the essential fruity flavor, but it also contributes to the luscious pink hue of the cheesecake. The tartness of the raspberries cuts through the creaminess of the filling, creating an exciting flavor contrast that elevates the dessert. Using fresh raspberries preserves the vibrant essence, but frozen raspberries can be just as effective when pureed properly.
Perfecting Your Cheesecake Texture
Achieving the perfect cheesecake texture hinges on a few key techniques, including proper mixing and cooling. Ensure all ingredients, especially cream cheese, are at room temperature before mixing to eliminate lumps. Additionally, the gradual cooling process in the oven after baking not only minimizes the risk of cracks but also allows the filling to set beautifully. Remember, the center should remain just slightly jiggly when you remove it from the oven for the most delightful texture.
Garnishing with Style
Garnishing your Pink Velvet Raspberry Cheesecake is more than just putting fresh raspberries on top; it's an opportunity to enhance both aesthetics and flavor. You can also consider adding a drizzle of raspberry sauce or a dusting of powdered sugar for a simple yet effective touch. These additions provide not only visual appeal but also a burst of fresh flavor, making each slice even more enticing and ready for your guests to enjoy.
FAQs
What can I do if my raspberry puree is too runny?
If your raspberry puree is too runny, you can strain it to remove excess liquid or simmer it over low heat to thicken it. Aim for a thicker consistency that holds up in the cheesecake for better flavor.
Can I use frozen raspberries instead of fresh?
Yes, frozen raspberries work well for this recipe. Just ensure they are thawed and drained to remove excess moisture before pureeing. This will provide similar flavor without compromising texture.
What if my cheesecake cracks while baking?
Cheesecake cracks can occur if the baking temperature is too high or if the cheesecake cools too quickly after baking. Using a water bath can help maintain even heat, and letting it cool gradually can prevent cracks.
How can I make the cheesecake sweeter if needed?
If you desire a sweeter cheesecake, you can gradually add more sugar to the filling during mixing. Be cautious to maintain balance, as excessive sweetness can overwhelm the raspberry flavor.
What if my cheesecake hasn't set fully after chilling?
If your cheesecake hasn't set fully, it might need additional chilling time. Allow it to chill for several more hours or overnight for the best results, so the filling can firm up completely.
Can I adjust the portion size for a smaller baking dish?
Certainly! To adjust the portion size, reduce each ingredient proportionally based on the new dish size. A decrease to a 9-inch pan may require halving the quantities to suit for a smaller dessert.
Conclusion
Creating a Pink Velvet Raspberry Cheesecake is more than just baking—it's about embracing flavors and colors to craft a dessert that captivates and delights. With each bite, you experience a delightful blend of sweetness and tartness that keeps you wanting more.
Enjoy the satisfaction of making this stunning dessert from scratch, sharing it with loved ones, and reveling in their joy as they savor every slice. Whether for a special occasion or a sweet treat at home, this cheesecake is sure to become a favorite.
Recipe Card

Indulge in a Pink Velvet Raspberry Cheesecake Delight
Ingredients
- 2 cups graham cracker crumbs
- 1/2 cup unsalted butter melted
- 3 8 oz packages cream cheese, softened
- 1 cup granulated sugar
- 3 large eggs
- 1 teaspoon vanilla extract
- 1/2 cup raspberry puree
- 1 tablespoon fresh lemon juice
- Red food coloring optional
- Fresh raspberries for garnish
Instructions
- Preheat the oven to 325°F (163°C).
- Prepare the crust by combining graham cracker crumbs and melted butter.
- Press the mixture into the bottom of a springform pan.
- Bake the crust for 10 minutes and let it cool.
- In a large bowl, beat the cream cheese until smooth.
- Add sugar, eggs, vanilla, raspberry puree, and lemon juice to the cream cheese.
- Add food coloring to achieve desired pink color.
- Pour the filling over the cooled crust.
- Bake the cheesecake for 55-60 minutes until the edges are set.
- Turn off the oven and let the cheesecake cool inside for 1 hour.
- Chill the cheesecake for at least 4 hours, preferably overnight.
- Garnish with fresh raspberries before serving.
Notes
Additional serving suggestions: pair with a crisp salad, garlic bread, or roasted seasonal vegetables for balance.
For make-ahead, prep components separately and assemble just before heating to preserve texture.
Taste and adjust with acid (lemon/vinegar) and salt right at the end to wake up flavors.


