Introduction
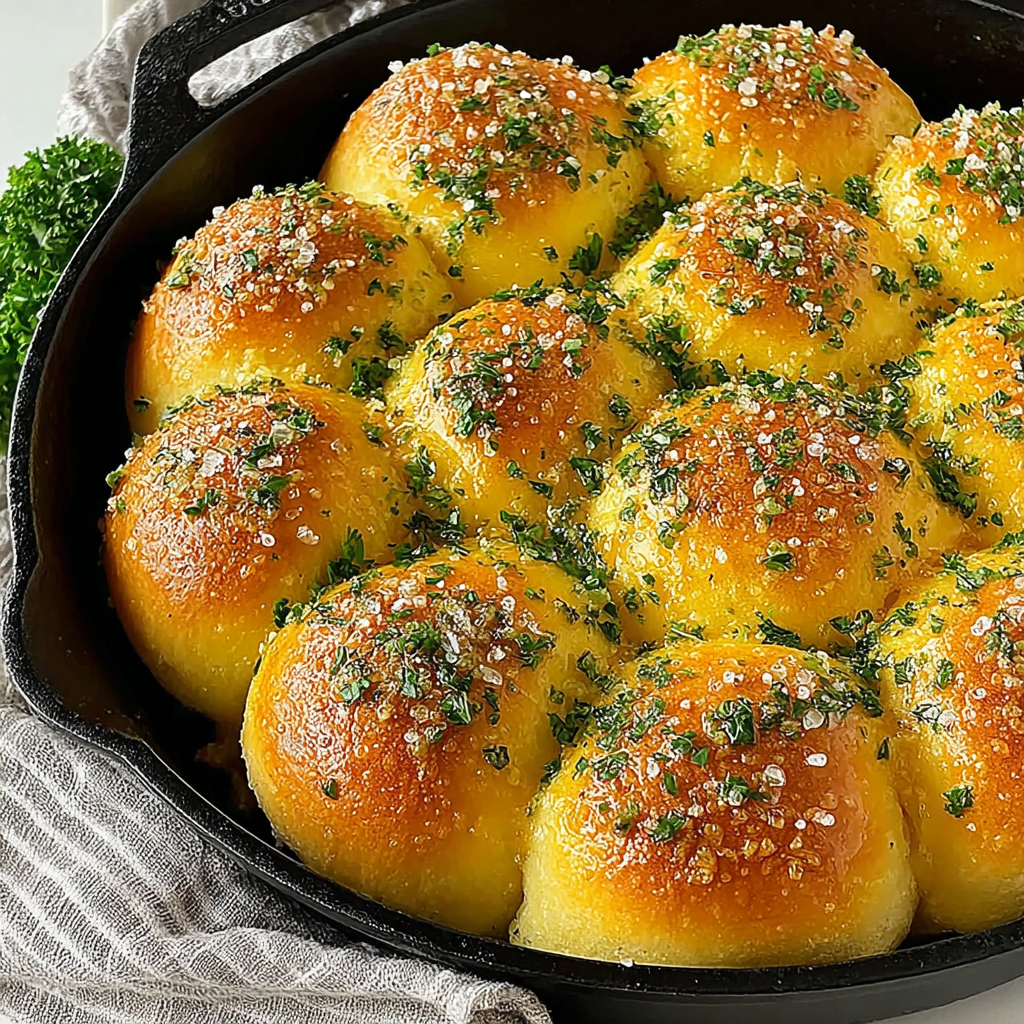
There's something magical about a batch of freshly baked dinner rolls. When made in a cast iron skillet, they achieve a perfectly crispy crust and a soft, pillowy interior that’s hard to resist. Whether it’s a weeknight dinner or a special occasion, these rolls make the meal feel complete.
Cast iron skillets are beloved in the kitchen not just for their durability but also for the even heat distribution they provide. This attribute is especially beneficial when baking, allowing for uniform browning that enhances the flavor and texture of the rolls. Perfecting a dinner roll recipe in cast iron isn’t just a cooking method; it’s a way to create lasting memories at the dining table.
Ingredients
- 2 1/4 teaspoons active dry yeast
This yeast is essential for leavening the dough, causing it to rise and develop a light texture. It activates when combined with warm water and sugar, creating carbon dioxide that helps the rolls expand. - 1 cup warm milk (100°F-110°F)
Milk adds richness and flavor to the rolls. The warmth helps activate the yeast, creating a better rise, while the fats in milk contribute to a tender crumb. - 1/4 cup granulated sugar
Sugar feeds the yeast, aiding in the rising process, while also sweetening the dough slightly, enhancing the flavor of the rolls. - 1/4 cup unsalted butter, melted
Butter not only adds flavor but also creates a softer texture in the rolls. It contributes to the overall moisture, giving them that desirable buttery taste. - 1 large egg
The egg enriches the dough, providing structure and stability. It also adds color and enhances the flavor, giving the rolls a beautiful golden hue when baked. - 3 1/2 to 4 cups all-purpose flour
Flour provides the main structure of the rolls. The right amount ensures that the rolls have the perfect balance of softness and stability, allowing them to rise well. - 1 teaspoon salt
Salt is crucial for flavor and enhances the overall taste of the rolls. It also strengthens gluten, which helps in creating a chewy texture.
Directions & Preparation
Step 1: Activate the yeast.
In a small bowl, combine warm milk, sugar, and yeast. Let it sit for 5-10 minutes until frothy. This step is vital as it ensures that your yeast is alive and active, which is necessary for a successful rise. If your yeast doesn’t froth, it may be inactive, and you should start with a new batch.
Step 2: Mix the wet ingredients.
In a large mixing bowl, combine melted butter, egg, and the activated yeast mixture. Mixing these together ensures that the butter cools slightly before combining with the egg, preventing cooking. It's essential that you incorporate the ingredients well for a uniform dough.
Step 3: Incorporate the flour and salt.
Gradually add the flour and salt to the wet ingredients. Start with 3 1/2 cups of flour, mixing until a soft dough forms. The dough should be slightly sticky but manageable. Too much flour will result in dense rolls, so add more as necessary, a little at a time.
Step 4: Knead the dough.
Turn the dough out onto a floured surface and knead for about 5-7 minutes until smooth and elastic. This step develops the gluten, which is crucial for a good texture. Proper kneading allows the dough to stretch and hold air, resulting in fluffy rolls.
Step 5: First rise.
Place the kneaded dough in a greased bowl and cover with a damp cloth. Allow it to rise in a warm area for about 1 hour or until it doubles in size. This step is critical for achieving light, airy rolls.
Step 6: Shape the rolls.
Once your dough has risen, punch it down to release air and turn it onto a lightly floured surface. Divide the dough into equal parts and shape them into balls. This step not only creates the rolls but also ensures even baking, as uniform sizes will rise and cook at the same rate.
Step 7: Prepare the skillet.
Preheat your oven to 350°F and grease your cast iron skillet. Arrange the shaped rolls in the skillet, leaving some space for them to rise. The skillet will provide even heat and a crispy crust, enhancing the overall roll experience.
Step 8: Second rise.
Cover the rolls again with a cloth and let them rise for an additional 30 minutes. This second rise is essential for achieving a light texture, as it allows the dough to expand further before baking.
Step 9: Bake the rolls.
Place the skillet in the preheated oven and bake for 20-25 minutes, or until golden brown on top. The baking process caramelizes the sugars and gives the rolls their delightful crust.
Step 10: Cool and serve.
Once baked, remove the skillet from the oven and let the rolls cool for a few minutes. This resting time helps to set the texture. Serve them warm, ideally with a pat of butter, to enjoy their full flavor.

Variations to Enhance Flavor
While these rolls are delicious as is, consider adding herbs or garlic for a savory twist. Incorporating ingredients like rosemary or roasted garlic into the dough can elevate the flavor profile, making your rolls perfect for various meals. You can also experiment with cheeses like cheddar or mozzarella, incorporating them into the dough or sprinkling on top before baking.
Serving Suggestions
These dinner rolls are incredibly versatile and can complement any main dish. They pair beautifully with roasted meats, soups, or stews. Try serving them alongside a pot of creamy garlic mashed potatoes or a rich beef stew, allowing guests to soak up all those delicious flavors. Their warm, fluffy texture is perfect for soaking in sauces and gravies.
Storage and Reheating Tips
If you have leftover rolls, store them in an airtight container at room temperature for up to two days. For longer storage, refrigerate or freeze them. To reheat, wrap them in foil and warm in a low oven, which helps to maintain their soft texture. Avoid microwaving, as it can make the rolls tough.
FAQs
What should I do if the dough is too sticky?
If your dough is overly sticky, gradually add small amounts of flour until it reaches a manageable consistency. Avoid adding too much flour at once, as it can lead to dense rolls.
Why did my rolls turn out dense?
Dense rolls are often a result of insufficient rising time or too much flour. Ensure that the dough doubles in size during the rising phase and measure your flour accurately.
Can I replace the milk with a non-dairy option?
Yes, you can substitute milk with almond milk, soy milk, or any other non-dairy alternative, keeping in mind that it should be warm to activate the yeast properly.
How can I tell when the rolls are done baking?
The rolls are done when they are golden brown on top and sound hollow when tapped. An internal temperature of about 190°F is an ideal cue.
What if my yeast doesn't activate?
If your yeast doesn't froth after 10 minutes, it may be dead. Avoid using the dough and start over with fresh yeast for the best results.
Is it possible to double this recipe?
Absolutely! Simply double each ingredient and, depending on the size of your skillet, you may need to bake in batches or use two skillets.
Conclusion
These cast iron skillet dinner rolls are not only simple to make, but they also impress guests and family alike with their delightful texture and flavor. The use of a cast iron skillet gives them an iconic crust and even baking that elevates them to a new level.
Whether enjoyed fresh out of the oven or served with your favorite meal, these rolls are sure to become a beloved staple in your kitchen. Happy baking!
Recipe Card

Delicious Cast Iron Skillet Dinner Rolls for Any Meal
Ingredients
- 2 1/4 teaspoons active dry yeast
- 1 cup warm milk 100°F-110°F
- 1/4 cup granulated sugar
- 1/4 cup unsalted butter melted
- 1 large egg
- 3 1/2 to 4 cups all-purpose flour
- 1 teaspoon salt
Instructions
- Activate the yeast.
- Mix the wet ingredients.
- Incorporate the flour and salt.
- Knead the dough.
- First rise.
- Shape the rolls.
- Prepare the skillet.
- Second rise.
- Bake the rolls.
- Cool and serve.
Notes
Additional serving suggestions: pair with a crisp salad, garlic bread, or roasted seasonal vegetables for balance.
For make-ahead, prep components separately and assemble just before heating to preserve texture.
Taste and adjust with acid (lemon/vinegar) and salt right at the end to wake up flavors.


